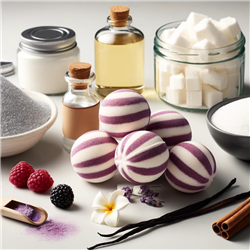
Crafting the perfect Black Raspberry Vanilla Bath Bomb is an exciting way to bring a touch of elegance and fragrance to your bath routine. This DIY Black Raspberry Bath Bomb recipe features delightful stripes of black raspberry and vanilla, creating not only a visually appealing bath bomb but one that is rich in aroma and effervescence. Below the recipe, you’ll find some additional tips to ensure your striped bath bombs turn out beautifully and function wonderfully.
INFORMATION- Difficulty: Intermediate
- Yield: 9-10 large bath bombs, about 8 oz each
TIMING- Prep Time / Clean Up: 15 Minutes
- Perform Time: 20 Minutes
- Dry Time: 2 Hours
- Total Time: 4 Hours 40 Minutes, 40 Minutes Active Time
SUPPLIESINGREDIENTSDIRECTIONSBefore starting this tutorial please make sure to read all instructions. Use caution when handling melted oils. Do not weigh fragrance oils into plastic containers; use glass or stainless steel. Use gloves when mixing to keep your manicure from getting scratched.
Cover the muffin pan with plastic wrap. Do not pull the plastic wrap too taut; you are making a little “hammock” for the bath bombs to rest in while they dry.
Step 1 – Mix the Bath Bomb BaseMelt the cocoa butter and shea butter in a microwaveable bowl or 4-cup Pyrex measuring cup for about 3 minutes on high power, or until melted, stirring midway through. Alternatively, melt the butter mixture in a double boiler on the stovetop. Set aside to cool briefly.
While your oils cool, combine the dry ingredients in a large mixing bowl. Break up any clumps using your fingers.
Add the sunflower oil, polysorbate 80, isopropyl alcohol, and the fragrance oil to the melted butter. Stir to combine.
Pour the oil mixture over the dry ingredients. Mix with your hands to combine, breaking up any clumps.
Divide the mixture in half. Remove half and transfer it to another mixing bowl.
Add ½ tsp. of purple liquid colorant to half of the bath bomb mixture. The mixture will fizz but don’t be concerned. Mix with your hands. Add ½ tsp. of water to the other half of the bath bomb mixture. Mix to combine.
Test the consistency of the bath bomb mixture. It should be the consistency of wet sand and hold a shape easily. If the mixture is a little crumbly, add a dash of isopropyl alcohol. If the mixture seems too wet, add a little baking soda. You may want to take the opportunity to make a practice bomb with each color. If your bombs crack, your mixture is too dry. If your bombs flatten out on the bottom, your mixture is too wet. Adjust accordingly.
Step 2 – Mold the bath bombsTo mold a bath bomb, place a little of each color in each half of the stainless steel mold. Do not press.
Heap the opposite color in each half of the mold. Again, do not pack the mixture in place; instead, mound the mixture in the center.
Cram the two halves of the mold together. Do not twist. Clean the edges of the mold with your thumb.
Hold the mold in one hand and use your opposite hand to give it a little squeeze. Remove half of the mold and set aside. Invert the bath bomb into your palm and remove the other half of the mold.
Place the finished bath bomb on your lined muffin pan.
Make the remaining bath bombs. Let them dry for two hours before moving, and then let them dry for 24 hours before using.
To use a bath bomb, fill the tub with hot water, and turn off the tap. Drop in a bath bomb and enjoy the fizzy show! One bath bomb should fizz for 2-3 minutes. Enjoy your bath!
Perfecting the Layering Technique for the Raspberry Vanilla Bath Bomb
Achieving the distinct, clean layers in your striped bath bombs requires careful preparation and timing. Alternating between the black raspberry and vanilla layers, make sure each layer is slightly moist enough to adhere to the previous one, but not too wet to cause premature fizzing. Compact each layer firmly to avoid any gaps that might cause the bath bomb to fall apart. Using a spoon or the back of a measuring cup can help compress the mixture evenly.
Achieving Vibrant Colors
For striking contrast in your striped bath bombs, use vibrant, skin-safe colorants. Gel colorants designed specifically for bath bombs tend to work well as they are concentrated and blend smoothly without adding too much moisture. Remember, the color of the mixture will lighten slightly as it dries, so adjust the intensity of the colorant accordingly to maintain the rich tones of black raspberry and vanilla.
Enhancing the Fragrance
To infuse your bath bombs with a lasting fragrance, mix the essential oils thoroughly with the dry ingredients before adding any wet ingredients. This helps distribute the fragrance evenly throughout each batch, ensuring that each bath bomb has a consistent scent level. For a stronger scent, consider layering the essential oils in each colored layer separately, which can help maintain the integrity of the black raspberry and vanilla aromas distinctly.
FAQs About the Striped Bath Bombs
How do I ensure my Black Raspberry Vanilla Bath Bomb holds together without cracking?
Make sure the mixture for each layer is damp enough to clump together when squeezed, resembling the consistency of damp sand. Press each layer firmly into the mold to ensure they bind together properly. Allowing the bath bomb to dry thoroughly before unmolding can also prevent cracking.
What's the best way to store my DIY Black Raspberry Bath Bomb to preserve the scent and fizz?
Store your bath bombs in an airtight container in a cool, dry place. This prevents moisture from triggering the fizzing reaction prematurely and protects the fragrance from degrading.
Can I use food coloring in my Vanilla Bath Bomb Recipe?
It is not recommended to use food coloring in bath bombs as they can stain the tub and skin. Instead, opt for cosmetic-grade colorants specifically designed for bath and body products to achieve vibrant colors without the risk of staining.